News
5 Steps In The Production of Animatronic Dinosaurs
Unlike small children’s toys as we commonly understand, animatronic dinosaurs are of substantial size, typically crafted in a one-to-one scale based on dinosaur fossils. They are often found in scenic areas, parks, and amusement parks, ranging from a few meters to several dozen meters in length. When visitors approach, these dinosaurs blink, open their mouths, wag their tails, and emit terrifying roars. They are highly popular among visitors as large-scale dinosaur models.
This article will introduce the 5 steps in the production of animatronic dinosaurs.
- Dino Skeleton Welding
- Structure Design & Motor Installation
- Carving Dino Form
- Creating Dino Skin
- Program & Debug Dino
The Chinese city of Zigong is a major production hub for animatronic dinosaurs, with numerous manufacturers. However, we almost uniformly employ the same production techniques and materials, primarily consisting of the following 5 production steps:
Step 1: Welding the internal skeleton of the dinosaur using steel.
We use I-beams to create the base according to the blueprint specifications. Following that, we use various sizes of round and square tubes to fabricate the main skeletal structure of the dinosaur. Subsequently, we use 6mm-diameter iron wire to weld the basic outline of the dinosaur. This step primarily focuses on shaping the overall form of the dinosaur.

Step 2: Designing the transmission structure and installing motors.
First, we design and weld the transmission structure on each joint of the dinosaur according to the client’s specifications. Subsequently, we install various power ratings of 24v DC motors (ranging from 100 watts to 2000 watts) based on the load conditions during motion. The key in this step is to ensure that the dinosaur’s movements appear as smooth as possible.
Motor options include: servo motors, stepper motors, and brushed motors.

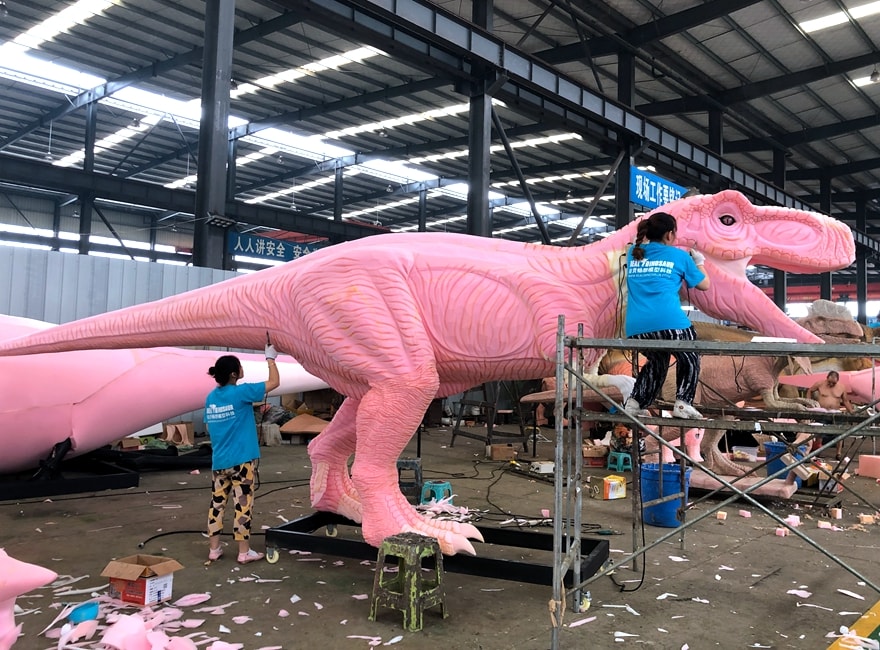
Step 3: Carving the dinosaur’s shape and creating skin texture.
We adhere high-density foam to the steel framework using glue. Subsequently, we sculpt the foam into the dinosaur’s shape using specialized tools. Next, we use a high-temperature soldering iron to imprint the texture of dinosaur skin onto the surface of the foam. This step is time-consuming and crucial for achieving the lifelike appearance of the final dinosaur model.

Step 4: Production of Dinosaur Skin.
We affix a layer of nylon stockings-like mesh onto the surface of the foam skin. This ensures that the dinosaur’s skin remains tear-resistant during movements. Over this mesh, we apply two coats of waterproof silicone, adding a waterproof layer. Finally, on the silicone layer’s surface, we use specialized pigments to achieve the desired coloration for the dinosaur’s skin. With these steps, the fundamental construction of a lifelike animatronic dinosaur is essentially completed.

Step 5: Programming Actions and Debugging the Animatronic Dinosaur.
The final step involves writing and debugging the action sequences for the animatronic dinosaur using languages such as C#. For example, coordinating mouth movements with roars from the speaker when the mouth opens, or having the dinosaur roar when tilting its head. Once the action program is debugged, we connect the animatronic dinosaur to the controller via cables for pre-delivery testing. The debugging process typically lasts for 24 hours, allowing the internal transmission structure to undergo thorough wear-in. This step is crucial, as it helps identify potential issues and ensures that the product received by the customer is flawless.

After completing the five steps above, a realistic animatronic dinosaur model is ready for production. If you are interested in our products, please contact us for a quote or click on our product catalog to explore more options.